DIY: AI-Powered Smart Scale Part 1
In January, 2020 looked like we (our startup) can optimize the food sector even more with an automated food waste tracking solution. I had already seen some solutions for smart scales and I though: why don’t we build our own, it should not be that hard? And indeed it isn’t, so I would like to tell you everything around it. I hope that you find the information interesting and useful.
Some usecases
Digitalisation of the stock: Keep track of the stock in the kitchen and know exactly how much and what food ingredients are available by measuring the weight of the newly bought products and classifying them via image recognition / QR codes scans.
Expiration date: Track the quality of the food by not only capturing its weight and pictures of it, but also storing its expiration date.
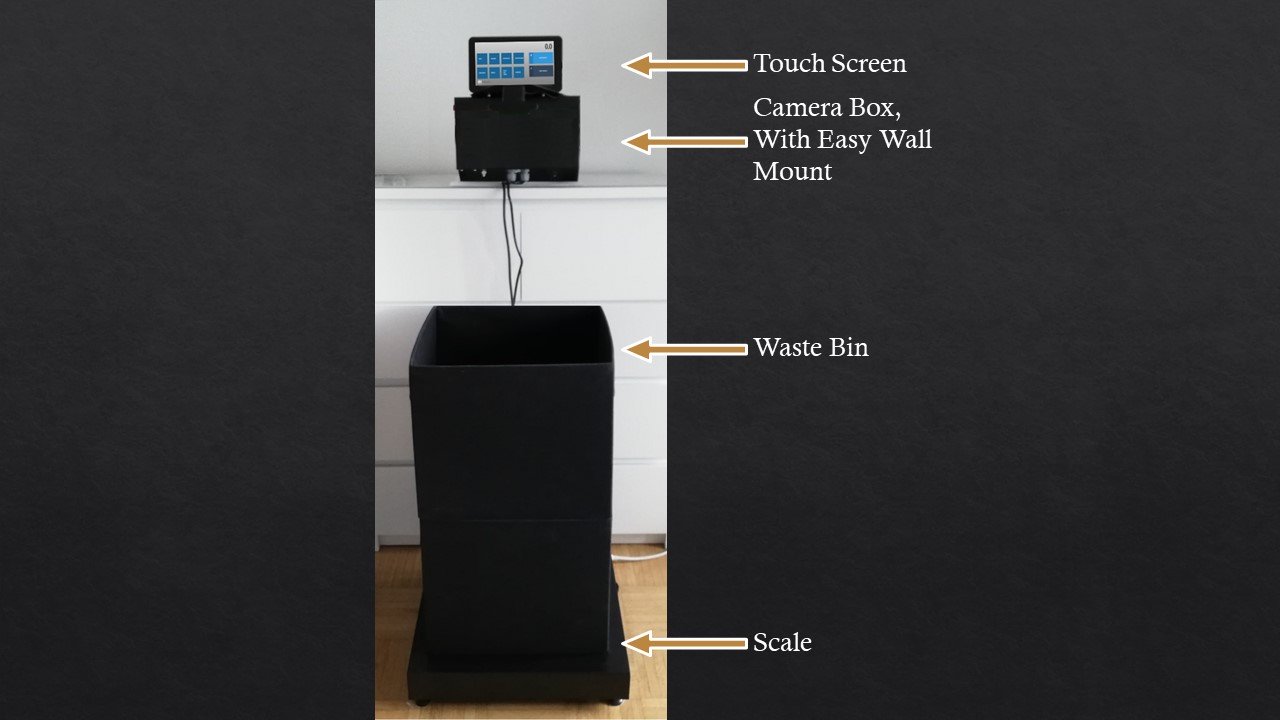
Evaluation of waste: This is a use case for a smart waste bin: the waste bin will be placed on the scale and every time ingredients are thrown away one can track what exactly and how much.
How it works
1. Food waste is disposed as usual in a bin and its weight is measured by the smart scale.
2a. Semi automated: The operator chooses type of food and reason for throwing food away on a touchscreen.
2b. Automated: The scale automatically recognizes the food. The operator can enter the reason for food thrown away and correct the recognition.
3. Data (images, recognitions and measurements) are surfaced in reports, answering questions like WHAT, HOW MUCH and WHY food is thrown away.
Hardware
Before getting the mentioned components I started drawing… As bad drawer as I am, you can get a rough idea where all is heading:
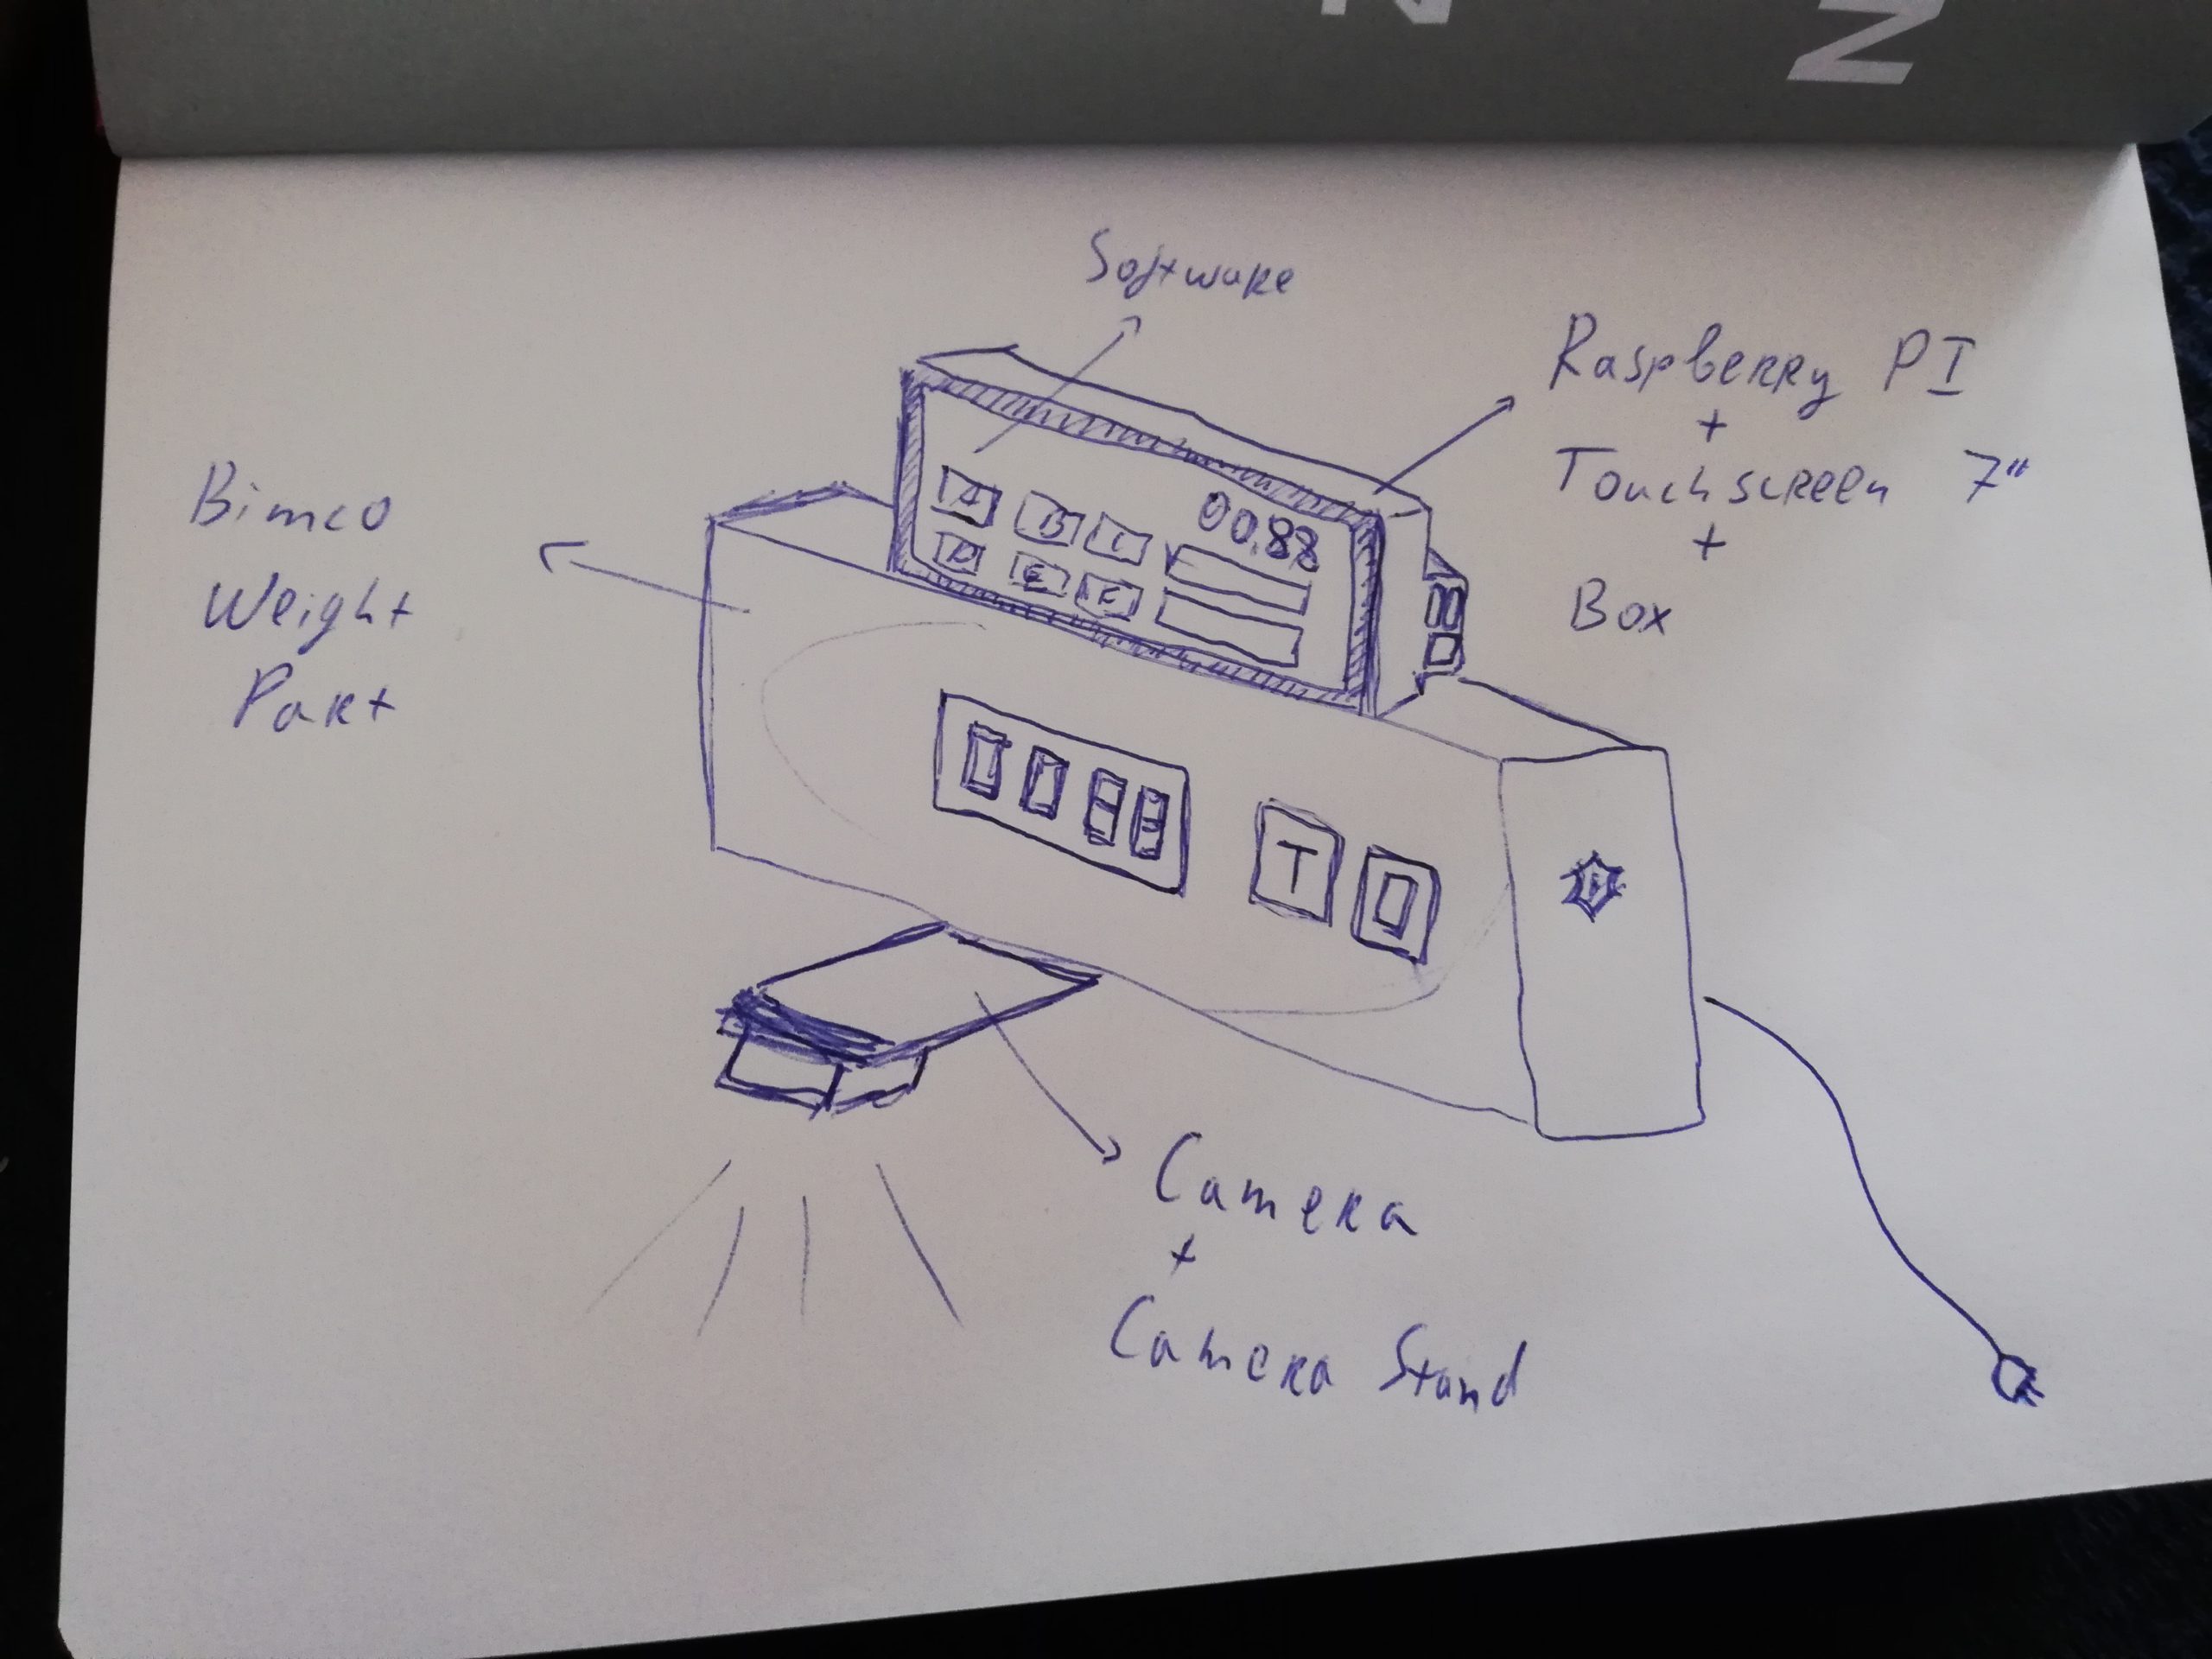
If you want to build the same scale you will need:
| Scale Bimco В30/К60 with RS-232 port | http://www.bimco.net/en/Platform-Scales/9/view/ |
| Raspberry Pi 4 Computer Modell B, 2GB RAM (a complete overkill for the scope of the project) |  |
| USB (A) to RS-232 |  |
| Raspberry Pi 4 Screen Case |  |
| Raspberry Pi 7-Inch Touch Screen Display |  |
| Logitech C270 Webcam |  |
| Stainless steel merging part | Custom made 🙂 |
Funny enougth, the stainless steel merging part was hardest for me to get, luckily my neighbour is a craftsman so I was able to get it exactly as needed.
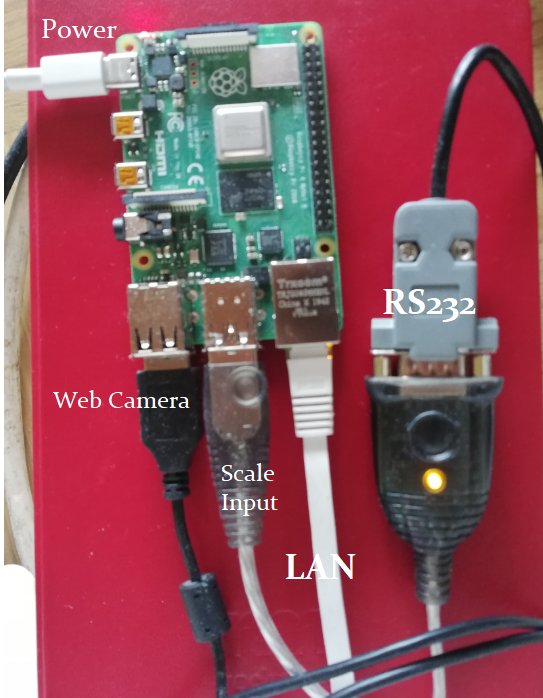
Once I had all the parts, I could finally get my hands dirty. I installed Ubuntu on the computer and once I was able to SHH with Putty into the machine I installed NodeJS to build and run the software. There will be an application on the Raspberry, that will collect the data from the scale, add timestamps, get pictures from the webcamera and push all that data to the AWS cloud. More on that in the next post, where I show you what software I wrote, how I ran it and how I integrated the AI part.
Before merging the Raspberry with the display I still used allmost all ports of the Raspberry. One for powering with USB-C, one USB for the web camera, one for the RS232 to USB cable that streamed the data from the scale and an Ethernet port connecting the Raspberry to my router:
Soon my next blog post for the software will follow. The link to the post will appear here.
0